We’ve all had that moment – you leave the kitchen for a bit and come back to find your pot burned black. Last week, I burned my Dutch oven while cooking tomato sauce, and I almost threw it away. But don’t toss your cookware just yet. There are several easy ways to save even the most burned pots.
Some of the links in this article may be affiliate links. If you make a purchase through these links, we may earn a small commission at no extra cost to you. Thank you.
According to Lisa McManus, executive tasting and testing editor at America’s Test Kitchen, “Most burnt-on food and stains can be removed with the right combination of cleaning methods and a little elbow grease.”
With some basic items from your kitchen and a little patience, you can fix this common cooking problem.
Kitchen Catastrophe Strikes

How many of us have experienced that sinking feeling when we smell something burning in the kitchen?
We’ve all been there—distracted by a phone call or forgetting to set a timer, only to return to a smoking pot and ruined dinner.
It’s frustrating, but don’t worry. Even the most charred stainless steel pots can be salvaged with the right approach. Immediate soaking with hot water and dish soap can help loosen the burnt residue.
##
Let’s talk about how to rescue that charred pot you’ve been staring at in despair.
We’ll walk through some effective methods that won’t damage your cookware, and point out common mistakes that might make the situation worse.
First, I think it’s important to understand what works for different pot materials before jumping into the cleaning process. Proper maintenance of your cookware, especially enameled cast iron, ensures longevity and reliable service.
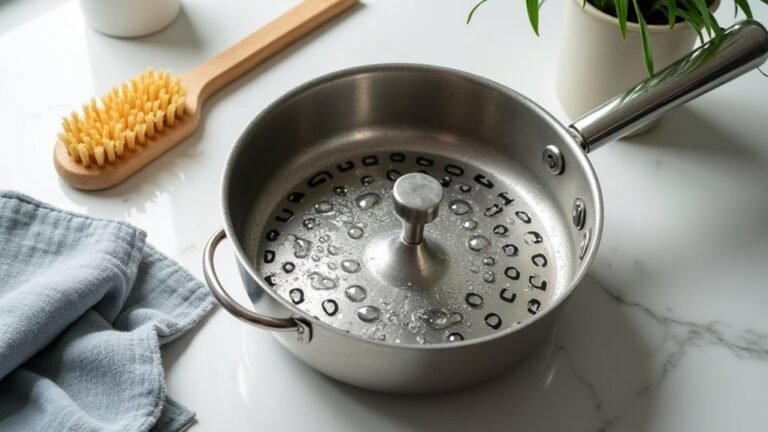
Things to Do When Cleaning a Charred Pot
Cleaning a charred pot requires patience and proper techniques to restore it to its original condition without damaging the surface.
The process involves multiple steps that work together to break down burnt residue and remove stubborn stains that regular washing can’t eliminate.
- Scrape while warm – Remove as much charred residue as possible using a wooden spoon while the pot is still warm to prevent further sticking and make subsequent cleaning steps more effective.
- Soak overnight – Fill the pot with warm water and dish soap, adding a dryer sheet if available, to soften burnt-on food particles before scrubbing.
- Deglaze with heat – Heat the pot on the stove with water or white vinegar and use a wooden spoon to scrape as the liquid simmers, helping break down stubborn residue.
- Apply baking soda paste – Create a paste using three parts baking soda to one part water, apply to charred areas, and let sit for several hours to lift stains before scrubbing.
- Scrub with aluminum foil – For stainless steel pots only, use a crumpled ball of tin foil with baking soda to effectively remove remaining char without scratching the surface.
Things to Avoid When Cleaning a Charred Pot
When tackling a charred pot, it’s vital to approach the cleaning process with care to prevent further damage.
Different pot materials require specific cleaning methods, and using improper techniques can permanently damage your cookware or reduce its lifespan.
Understanding what to avoid when cleaning charred pots will help preserve their functionality and appearance for years to come.
- Soaking cast-iron pots in water – This destroys the protective seasoning layer and promotes rust formation, compromising the pot’s longevity.
- Using steel wool or abrasive scrubbers on nonstick surfaces – These tools scratch the nonstick coating, making food stick and potentially releasing harmful chemicals into food.
- Applying tin foil with baking soda to non-metal pans – This DIY cleaning method works only for metal surfaces and can scratch ceramic, glass, or coated pots.
- Scrubbing any pot for more than 10 minutes – Extended scrubbing rarely improves results and can wear down protective surfaces unnecessarily.
- Washing cast-iron with soap after removing char – Soap strips away the seasoning, requiring additional work to re-season the pot with oil and heat.
- Using bleach on aluminum pots – Bleach reacts with aluminum, causing discoloration and potential damage to the metal surface.
- Putting hot pans directly into cold water – The thermal shock can warp or crack pots, especially those made of thinner materials.
Steps
Dealing with a charred pot can be frustrating, but with the right approach, you can restore it to its former glory without damaging the surface.
The key is to work gradually, using gentle methods first before moving to more intensive cleaning techniques.
Following these steps will help break down burnt residue layer by layer while preserving your cookware’s integrity.
Step 1: Scrape off loose burnt bits using a wooden spoon while the pot is still warm to prevent damaging the surface.
Step 2: Fill the pot with warm water and add a few drops of dish soap, then let it soak for several hours or overnight.
Step 3: After soaking, pour out the dirty water and refill with fresh water and dish soap, then bring to a boil for 5-10 minutes.
Step 4: Create a paste by mixing baking soda with water and apply it to any remaining burnt areas.
Step 5: Let the baking soda paste sit for at least an hour to work on the stubborn residue.
Step 6: Gently scrub the pot with a non-scratch sponge, working in circular motions.
Step 7: Rinse thoroughly with warm water to remove all cleaning agents.
Step 8: Dry the pot completely to prevent moisture damage or rust formation.
Final Thoughts
After working through the step-by-step process, restoring a charred pot doesn’t have to be the kitchen nightmare many of us fear.
We’ve found that baking soda truly shines as our go-to solution—it’s gentle yet effective on most surfaces.
##

Rescuing a charred pot doesn’t have to mean throwing it away or spending hours scrubbing with harsh chemicals. Whether you’re dealing with a scorched stainless steel pan, a blackened cast iron skillet, or any other cookware casualty, the right combination of gentle cleaning agents like baking soda and vinegar can work wonders. These kitchen staples create effective chemical reactions that break down burnt residue while protecting your valuable cookware.
Remember that patience is key in this process—giving the cleaning agents time to work their magic often yields better results than aggressive scrubbing. Each type of pot may require a slightly different approach, but the fundamental principles of using mild abrasives, leveraging chemical reactions with vinegar and baking soda, and avoiding damage to specialized surfaces remain consistent.
Next time you find yourself facing a cooking disaster, take a deep breath and reach for these simple solutions. With these techniques in your cleaning arsenal, you can extend the life of your cookware and maintain its performance for years to come. Don’t let a burnt pot discourage you—even the most experienced cooks have their mishaps, and now you have the knowledge to overcome them!