Keeping your hummingbird feeder clean is super important, but many of us might not be doing it the right way. These small, zippy birds need more than just fresh sugar water – they need a clean place to eat that won't make them sick from bacteria or mold. While cleaning a feeder may look easy, there are some important rules to follow to keep these tiny birds healthy.
Some of the links in this article may be affiliate links. If you make a purchase through these links, we may earn a small commission at no extra cost to you. Thank you.
According to the National Audubon Society, "In hot weather, change the nectar every two days. In cooler weather, it can last four to five days before needing to be changed. Always clean the feeder well each time you refill it."
Tiny Feeders Need Cleaning Daily
While maintaining a hummingbird feeder might seem like a simple task, these tiny nectar stations require daily cleaning to keep our feathered friends healthy and safe.
In hot weather, we need to empty the feeder and clean it daily, as nectar can spoil within three days.
Let's make cleaning the feeder part of our daily routine to prevent harmful mold and bacteria growth.
##
Let's look at the essential things we need to know when cleaning our hummingbird feeders, including both the do's and don'ts that'll keep our tiny visitors safe and healthy.
We'll walk through the step-by-step process of proper cleaning methods, from disassembly to reassembly, using safe cleaning solutions and tools.
Our final thoughts will emphasize how regular maintenance not only protects these delicate birds but also helps us enjoy watching them visit our feeders throughout the season.
Things to Do When Cleaning a Hummingbird Feeder
Proper cleaning of a hummingbird feeder is essential for maintaining the health of these delicate birds and ensuring they continue to visit your garden.
Regular maintenance prevents the growth of harmful bacteria and mold that can make hummingbirds sick, while also keeping the nectar fresh and attractive to these tiny visitors.
- Complete disassembly – Take apart all components of the feeder including the basin, ports, and perches
- Vinegar solution preparation – Mix 1 quart of water with 1/4 cup of distilled white vinegar
- Thorough cleaning – Scrub the nectar reservoir and soak feeding ports for 10 minutes in the solution
- Extensive rinsing – Use warm water to remove all traces of cleaning solution
- Complete drying – Allow all parts to air dry thoroughly before reassembly
- Regular maintenance – Clean the feeder every second refill or more frequently in hot weather
- Careful reassembly – Put all components back together properly to prevent leaks
- Fresh nectar – Fill with new nectar solution only after the feeder is completely clean and dry
Things to Avoid When Cleaning a Hummingbird Feeder
Properly cleaning a hummingbird feeder requires careful attention to avoid harmful practices that could endanger these delicate birds. While maintaining a clean feeder is essential for hummingbird health, using incorrect cleaning methods or materials can introduce toxins or create unsafe feeding conditions that may harm or deter the birds from visiting your feeder.
- Harsh chemical cleaners or bleach – These leave dangerous residues that can poison hummingbirds even in small amounts.
- Old or expired nectar – Contains harmful bacteria and mold growth that can make birds sick.
- Direct sunlight during cleaning – Heat accelerates nectar spoilage and makes thorough cleaning more challenging.
- Red dyes or artificial coloring – These additives are toxic to hummingbirds and serve no beneficial purpose.
- Irregular cleaning schedule – Neglecting regular maintenance leads to contamination and creates unhealthy feeding conditions.
- Hot water only cleaning – Using hot water alone without soap or vinegar solution is insufficient to remove all bacteria.
- Inadequate rinsing – Leaving soap or cleaning solution residue can contaminate fresh nectar.
- Metal cleaning brushes – Can scratch the feeder surface, creating places for bacteria to grow.
Steps
Properly cleaning a hummingbird feeder is essential for maintaining the health of these delicate birds and ensuring they continue to visit your garden.
A thorough cleaning removes harmful mold, bacteria, and residue that can accumulate in feeding ports and reservoirs, while preventing the spread of diseases among hummingbird populations.
Regular maintenance also extends the life of your feeder and keeps the nectar fresh and appealing to these fascinating creatures.
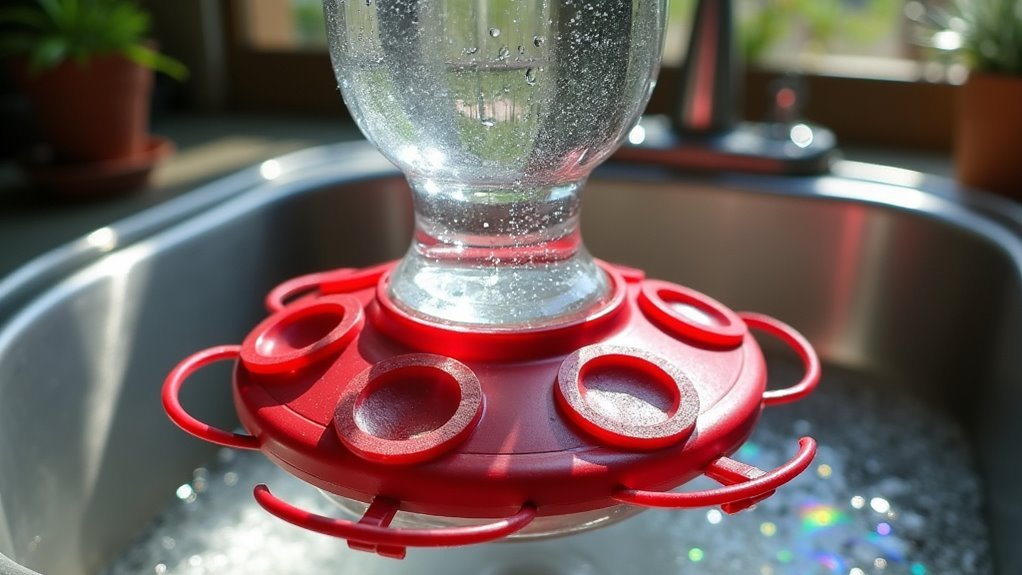
Step 1: Empty the feeder completely and take apart all removable components
Step 2: Create a cleaning solution by mixing one quart of water with 1/4 cup of distilled white vinegar
Step 3: Clean the nectar reservoir using the vinegar solution and a bottle brush to remove buildup
Step 4: Submerge feeding ports and removable parts in the cleaning solution for 10 minutes
Step 5: Use small brushes to clean all ports and openings thoroughly
Step 6: Rinse all components with warm water until all vinegar solution is removed
Step 7: Allow all parts to air dry completely
Step 8: Reassemble the feeder carefully
Step 9: Fill with fresh nectar solution
Step 10: Hang the feeder in its original location
Final Thoughts
Maintaining a clean hummingbird feeder isn't just about providing fresh nectar – it's about creating a safe and healthy environment for these tiny visitors to your garden.
When we regularly clean our feeders, paying special attention to feeding ports and nectar quality, we prevent mold and harmful bacteria from developing.
##

Maintaining a clean hummingbird feeder is essential for the health and wellbeing of these delicate creatures. By following a consistent cleaning schedule and using proper cleaning solutions, you can provide a safe feeding environment that will keep hummingbirds returning to your garden.
Remember that a little extra effort in cleaning and maintenance goes a long way – not only will it protect the birds, but it will also extend the life of your feeder.
A clean feeder is an investment in both the birds' wellbeing and your equipment's longevity.
Take action today by establishing a regular cleaning routine for your hummingbird feeder. Start with weekly cleanings, adjust the frequency based on weather conditions, and always stay vigilant for signs that indicate the need for immediate cleaning.
Your dedication to proper feeder maintenance will help guarantee these fascinating birds remain healthy visitors to your outdoor space for years to come.