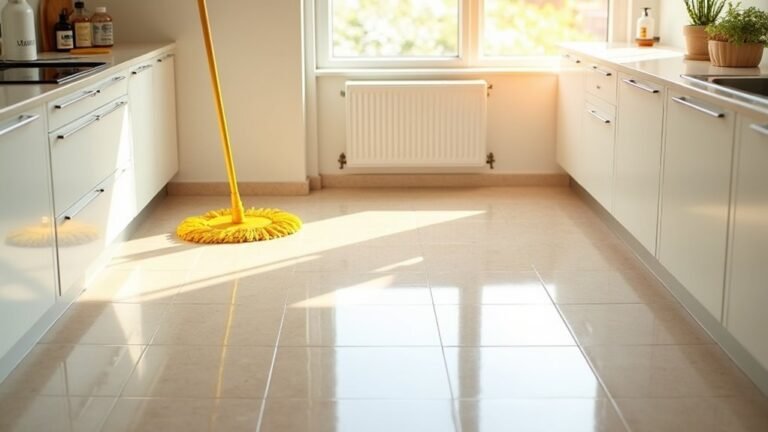
We've all faced those dirty lines between our tiles and wondered how they got that way. While mopping keeps the tiles looking good, those stubborn grout lines seem to trap every bit of dirt that touches our floors. Before you think about getting new floors or paying for expensive cleaning, there are some simple ways to make your grout look new again.
Some of the links in this article may be affiliate links. If you make a purchase through these links, we may earn a small commission at no extra cost to you. Thank you.
According to Bob Villa, a home improvement expert: "The number one mistake people make is letting grout get too dirty before cleaning it. Regular maintenance is much easier than deep cleaning badly stained grout."
Your grout is like a sponge – it soaks up spills, dirt, and foot traffic marks because it's porous, which means it has tiny holes that trap grime. Think of grout lines as the roads between your tiles – they get a lot of traffic and need regular care to stay clean.
When your grout gets dark or discolored, it can make even the cleanest tiles look messy. But don't worry – with the right cleaning method, you can bring back that clean look your floor had when it was new.
Dirty Grout Ruins Tiles

While many homeowners focus on keeping their tile floors spotless, they often overlook the critical role that grout plays in their flooring's overall appearance.
When we let dirty grout accumulate, it doesn't just look unsightly – it can harbor mold and mildew, leading to health concerns.
That's why we need to deep clean our grout regularly and maintain proper grout sealant to protect our investment.
##
Let's look at the essential things to know when cleaning grout, including both helpful techniques and common mistakes to avoid.
We'll walk through a step-by-step process that'll make your grout cleaning tasks more manageable and effective, from choosing the right cleaning solutions to using proper tools and techniques.
Whether you're dealing with everyday dirt or stubborn stains, we'll cover everything you need to know to keep your tile floors looking their best.
Things to Do When Cleaning Grout on Tile Floor
Cleaning grout on tile floors requires careful preparation and execution to achieve ideal results. The process involves multiple steps, from initial surface preparation to the final rinse, and using the right cleaning solution is essential for removing stubborn stains without damaging the grout or surrounding tiles.
- Sweep floor thoroughly – Remove all loose dirt and debris to guarantee the cleaning solution can effectively reach the grout.
- Mix cleaning solution – Combine baking soda, hydrogen peroxide, and dish soap to create a powerful yet safe cleaning paste.
- Apply solution in sections – Work in manageable areas and allow the cleaner to sit for up to 15 minutes.
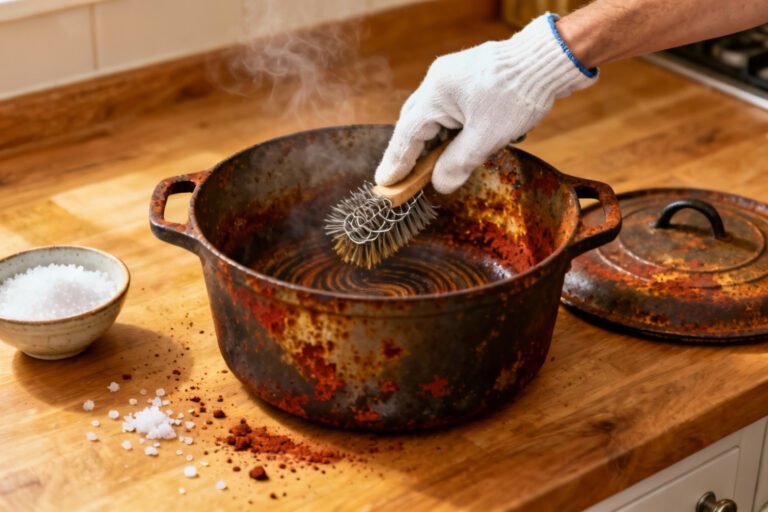
- Scrub with appropriate tool – Use a grout brush or old toothbrush to work the solution into the grout lines.
- Rinse thoroughly – Remove all cleaning solution residue with clean water and a sponge or microfiber cloth.
- Dry the surface – Wipe the area completely dry to prevent water spots and new dirt from settling.
- Schedule regular maintenance – Plan monthly cleaning sessions to maintain the grout's appearance and prevent buildup.
Things to Avoid When Cleaning Grout on Tile Floor
Maintaining clean grout between tiles requires careful attention to cleaning methods and products to prevent damage to both the grout and surrounding tiles.
While it may be tempting to use harsh chemicals or aggressive scrubbing techniques for stubborn stains, these approaches can lead to long-term deterioration of your flooring and create costly repair needs.
- Highly acidic cleaners and bleach – These harsh chemicals break down unsealed grout material and weaken its structural integrity over time.
- Abrasive cleaning tools – Steel wool, rough scrubbing pads, and wire brushes scratch tile surfaces and erode grout lines.
- Commercial toilet bowl cleaners – The strong chemical formulations are too harsh for grout and can cause discoloration and deterioration.
- Allowing cleaners to dry on surfaces – Dried cleaning solutions leave behind residue and can make future cleaning more challenging.
- Grout pens as cleaning tools – These products mask stains rather than remove them and don't address underlying cleanliness issues.
Steps
Cleaning grout effectively requires a systematic approach to guarantee the best possible results while protecting both the grout and tile surfaces. The process begins with basic preparation and progresses through cleaning and maintenance steps that, when followed correctly, can restore your grout lines to their original appearance and maintain them over time.
Step 1: Sweep or vacuum the tile floor thoroughly to remove loose debris and dirt.
Step 2: Mix the DIY cleaning solution using 3/4 cup baking soda, 1/4 cup hydrogen peroxide, and 1 tablespoon mild dish soap.
Step 3: Apply the cleaning mixture directly to the grout lines.
Step 4: Let the solution sit for 10-15 minutes to penetrate the dirt.
Step 5: Scrub the grout lines using a grout brush or old toothbrush in a back-and-forth motion.
Step 6: Rinse the area thoroughly with clean water using a sponge or microfiber cloth.
Step 7: Dry the surface with a clean towel to prevent water spots.
Step 8: Repeat monthly for maintenance or immediately when spills occur.
Final Thoughts
While having sparkling clean grout might seem like a challenging task, we've shown that it's achievable with the right approach and consistent maintenance.
Whether you choose a homemade grout cleaner, steam cleaner, or specialized cleaning solution, monthly scrubbing and proper sealing are key.
Remember to apply to grout gently with a grout brush to remove stains effectively, and always maintain a protective barrier through regular deep cleaning and sealing.
##

Maintaining clean grout doesn't have to be an overwhelming task when you have the right tools and techniques at your disposal.
Whether you choose the DIY baking soda solution, oxygenated bleach mix, or opt for steam cleaning, regular maintenance is the key to keeping your grout looking fresh.
Start with the gentlest cleaning method and work your way up to stronger solutions only when needed. Remember to always test cleaning solutions first and protect your grout's longevity by incorporating weekly maintenance into your cleaning routine.
Take action today by evaluating your grout's condition and choosing the most appropriate cleaning method.
With consistent care and the right approach, you can transform dingy grout lines into clean, bright accents that enhance your tile floor's overall appearance.
Your effort in maintaining clean grout won't only improve your home's aesthetics but also protect your investment in your flooring for years to come.