Mold in shower grout is an ugly, unhealthy, and common problem in most bathrooms. We've all seen those dark spots showing up between our tiles, making our clean shower look dirty. You might think you need expensive cleaners from the store, but you can actually fight this problem with simple items you already have at home.
Some of the links in this article may be affiliate links. If you make a purchase through these links, we may earn a small commission at no extra cost to you. Thank you.
According to Kelly Reynolds, Ph.D., director of the Environment, Exposure Science and Risk Assessment Center at the University of Arizona: "Bathroom mold grows because these areas are damp, dark, and often have poor air flow, creating the perfect environment for mold spores to thrive."
The good news is that you can get rid of shower mold and stop it from coming back using basic cleaning methods. Whether you're dealing with a few spots or bigger patches of mold, there are ways to make your shower grout look fresh and clean again without spending too much money.
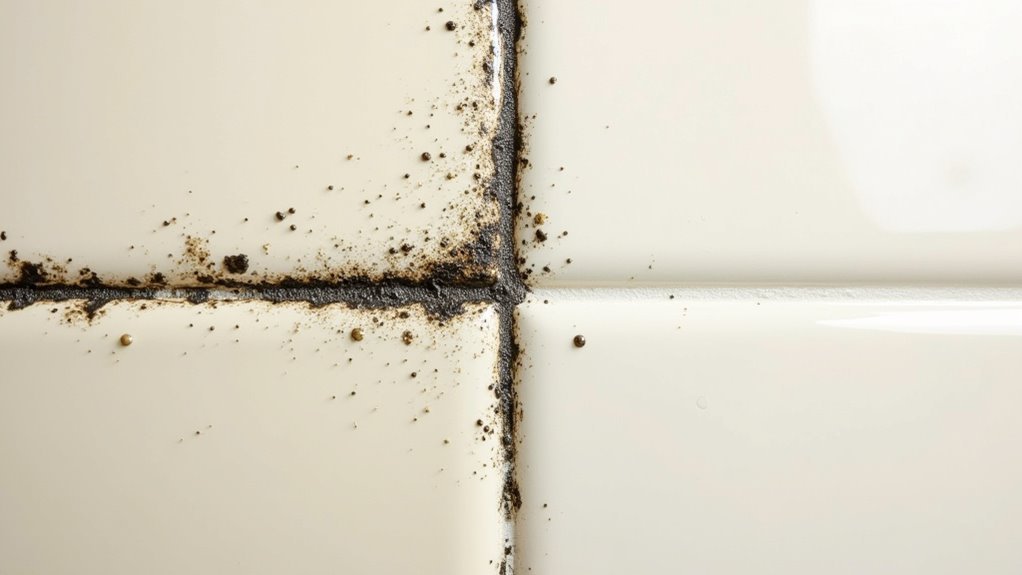
Black Spots Mean Mold
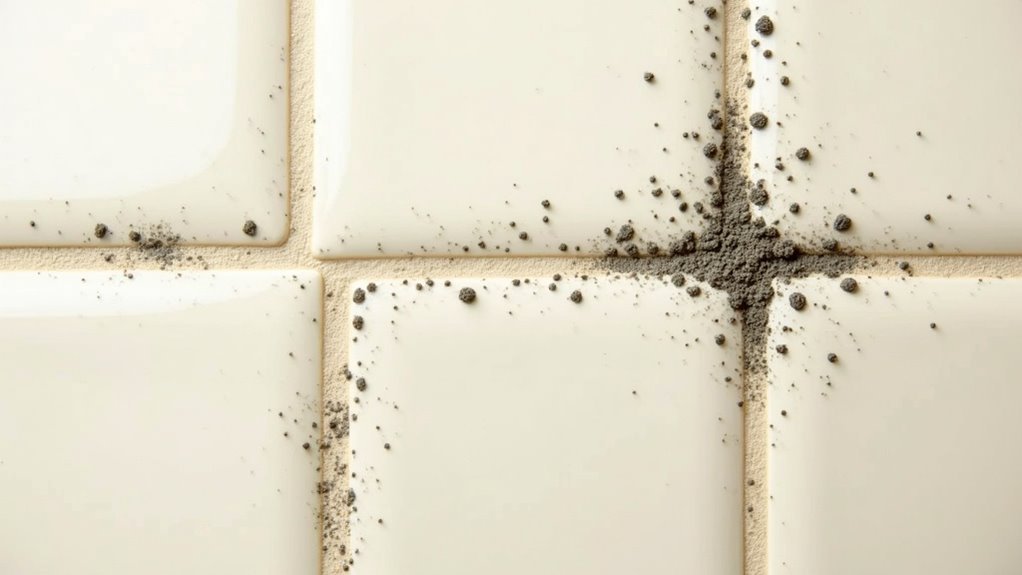
Those pesky black spots appearing on your shower grout aren't just unsightly stains – they're likely signs of mold growth.
We often see these dark patches forming along grout lines where moisture and soap scum accumulate.
When mildew and mold take hold, they can spread quickly if left untreated.
Regular cleaning with appropriate cleaning solutions is essential, as black mold spores can pose serious health risks.
##
Let's explore what to do and what not to do when tackling mold on shower grout, as using the right approach makes all the difference.
We'll walk through a simple step-by-step process that'll help you get rid of that pesky mold while protecting your grout's integrity.
From choosing the right cleaning solution to proper scrubbing techniques and preventive measures, we'll cover everything you need to know to keep your shower grout clean and mold-free.
Things to Do When Cleaning Mold on Shower Grout
Cleaning mold from shower grout requires careful attention to both the cleaning method and safety precautions to guarantee effective results. The right combination of cleaning solutions, proper application techniques, and adequate ventilation will help eliminate unsightly mold growth while protecting both the grout and your health during the cleaning process.
- Mix cleaning solution – Prepare either a 1:4 bleach-water mixture, baking soda paste, or select undiluted white vinegar based on your grout type.
- Ventilate the area – Open windows and turn on exhaust fans to guarantee proper air circulation during cleaning.
- Apply solution generously – Cover affected areas thoroughly and allow solution to sit for the recommended time.
- Scrub thoroughly – Use a stiff brush to work the cleaning solution into the grout lines with firm pressure.
- Let solution dwell – Allow cleaning agents to penetrate the mold for several minutes before scrubbing again.
- Rinse completely – Remove all cleaning solution residue with clean water to prevent damage to grout.
- Dry the area – Use a clean towel to remove excess moisture and help prevent future mold growth.
- Monitor results – Check cleaned areas after 24 hours and repeat process if any mold remains visible.
Things to Avoid When Cleaning Mold on Shower Grout
When cleaning mold from shower grout, it's crucial to approach the task with proper caution and awareness of potential hazards. Improper cleaning techniques or using the wrong products can't only damage your shower's surfaces but also create dangerous situations that could affect your health and safety.
- Chlorine bleach in enclosed spaces – Creates harmful fumes and can deteriorate surrounding surfaces, leading to long-term damage.
- Mixing cleaning chemicals – Combining different cleaners, especially bleach with other products, can result in toxic gas formation.
- Abrasive cleaning tools – Wire brushes and rough scrubbers can scratch grout and tiles, creating more spaces for mold to grow.
- Poor ventilation – Inadequate airflow during and after cleaning traps moisture and encourages rapid mold regrowth.
- Using incorrect cleaning products – Disregarding manufacturer guidelines for appropriate cleaners risks damaging or discoloring grout.
- Letting mold problems persist – Delaying mold removal allows spores to spread and can lead to more extensive damage.
- Spot cleaning only – Focusing solely on visible mold while ignoring surrounding areas can lead to recurring problems.
- Using excessive water – Over-saturating during cleaning can seep into walls and create new mold issues.
Steps
Cleaning mold from shower grout requires careful attention and the right cleaning solutions to effectively eliminate the problem while protecting the grout's integrity.
The process involves preparing an appropriate cleaning agent, applying it correctly, and maintaining proper ventilation throughout the cleaning process to guarantee both effectiveness and safety.
Step 1: Mix your cleaning solution (either baking soda paste or 1:4 bleach-to-water ratio)
Step 2: Open bathroom windows or turn on ventilation fans
Step 3: Apply the cleaning solution generously to affected grout lines
Step 4: Let the solution sit for 10 minutes to penetrate the mold
Step 5: Scrub vigorously with a brush or toothbrush, focusing on problem areas
Step 6: Rinse thoroughly with clean water to remove all residue
Step 7: Dry the area completely with a clean towel
Step 8: Inspect grout lines to verify all mold is removed
Step 9: Apply a preventive cleaning solution weekly to maintain cleanliness
Final Thoughts
Maintaining a mold-free shower isn't just about the initial cleaning process – it's about establishing good habits for the long term.
Whether we're using white vinegar or hydrogen peroxide to tackle moldy grout, proper cleaning techniques combined with good ventilation make all the difference.
Remember to rinse thoroughly and remove excess moisture from tiles after each shower to prevent mold from returning.
##
Cleaning mold from shower grout doesn't have to be an overwhelming task. With regular maintenance and the right cleaning approach, you can keep your shower grout looking fresh and hygienic.
Remember that prevention is just as important as cleaning – proper ventilation and drying surfaces after each use will greatly reduce mold growth. Whether you choose natural solutions like baking soda and hydrogen peroxide or opt for stronger commercial cleaners, consistency is key.
Take action today to protect your bathroom's appearance and your family's health. Start with a thorough initial cleaning, then implement a weekly maintenance routine.