We’ve all faced this kitchen headache—looking at a cheese grater covered in stuck-on cheese that won’t budge. When you leave it in the sink overnight, cleaning it the next day becomes even harder. Most of us struggle to clean these kitchen tools properly. The small holes and sharp edges make them tough to clean without hurting our fingers.
Some of the links in this article may be affiliate links. If you make a purchase through these links, we may earn a small commission at no extra cost to you. Thank you.
According to Carolyn Forte, director of home appliances and cleaning products at Good Housekeeping Institute, “The trick is to clean your grater right after using it, before the cheese has a chance to dry and harden. A quick rinse in hot water makes the job much easier.”
Grate Expectations Ahead
Why is it that the most useful kitchen tools are often the most frustrating to clean?
Cheese graters, with their sharp little holes, seem designed to trap food and destroy cleaning brushes.
We’ve all been there—that $1.99 Gain brush fraying after just a few uses.
And don’t get us started on dishwashers!
They might blunt those precious blades faster than you can say “cheddar.” Regular maintenance helps prevent future burnt pot situations.
##
Let’s go over some helpful pointers for keeping your cheese grater clean without ruining it or hurting yourself.
We’ll share what works (like that brush technique I mentioned earlier) and what definitely doesn’t (please don’t use your fingers—trust me, I’ve made that mistake).
Perhaps the most important thing to remember is that regular cleaning right after use prevents those stubborn dried-on bits that make the whole job ten times harder. Additionally, proper cleaning of kitchen utensils, like your grater, is essential to avoid bacterial growth and ensure safe food preparation.
Things to Do When Cleaning a Cheese Grater
Cleaning a cheese grater effectively requires a methodical approach to remove all cheese residues while protecting both the grater and your hands.
The process starts with preparation by soaking the grater in warm, soapy water to soften stubborn cheese bits, followed by careful scrubbing with appropriate tools, and finishes with thorough rinsing to guarantee no soap or food particles remain.
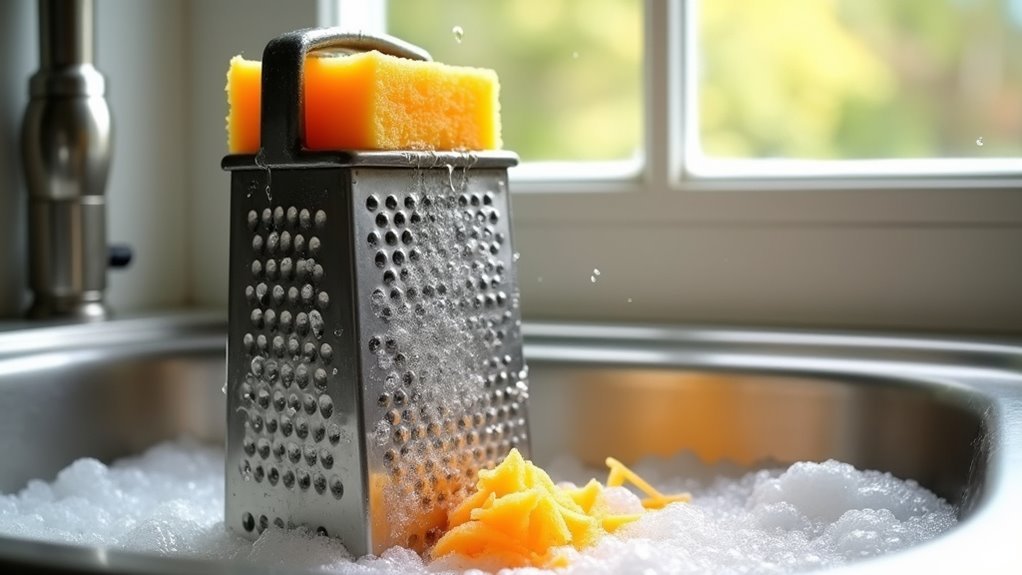
- Soak the grater in warm, soapy water for 5-10 minutes to loosen hardened cheese residue.
- Select a sturdy brush with plastic bristles that can reach into the grater’s holes without damaging the metal.
- Hold the grater firmly by its handle or frame, keeping fingers away from the sharp grating surfaces.
- Scrub in a circular motion on both sides of the grater, applying gentle pressure to remove debris.
- Pay special attention to corners and edges where cheese tends to accumulate.
- Rinse thoroughly under running water, checking that all holes are clear of residue.
- Repeat the scrubbing process if any cheese particles remain visible.
- Shake excess water off the grater and place it upright to air dry completely.
- Inspect the grater before storing to guarantee it’s clean and free of moisture that could cause rusting.
Things to Avoid When Cleaning a Cheese Grater
When it comes to maintaining your cheese grater, knowing what not to do is just as important as proper cleaning techniques.
Improper cleaning methods can damage your grater, leave residue behind, or even pose safety hazards to your hands.
Understanding these pitfalls will help extend the life of your grater while ensuring it remains hygienic and effective for future use.
- Sponges and rags – These cleaning tools quickly tear on the sharp edges of graters, leaving behind fibers that mix with food residue and create more buildup rather than removing it.
- Brillo pads and steel wool – These abrasive cleaners often disintegrate during scrubbing, becoming ineffective while potentially leaving behind small metal fragments that could contaminate food.
- Bare fingers – Directly rubbing the grater with your fingers is dangerous, risking painful cuts and abrasions while providing minimal cleaning benefit to the grater’s surface.
- High-pressure water sprays – Though seemingly effective, forceful water streams often fail to dislodge particles trapped in the tiny holes and crevices of the grater.
- Dishwasher cleaning – Regular dishwasher use can damage plastic components, dull the cutting edges prematurely, and may not effectively clean dried-on cheese from all the small perforations.
Steps
Cleaning a cheese grater can be a challenging kitchen task due to food particles that become lodged in the tiny sharp holes and crevices.
Without proper cleaning techniques, residue can harden, creating potential bacterial growth or affecting the taste of foods in future use.
Additionally, the sharp edges of graters pose a risk to fingers during cleaning if approached incorrectly.
By following these simple yet effective steps, you can thoroughly clean your cheese grater while protecting your hands and maintaining the tool’s functionality for years to come.
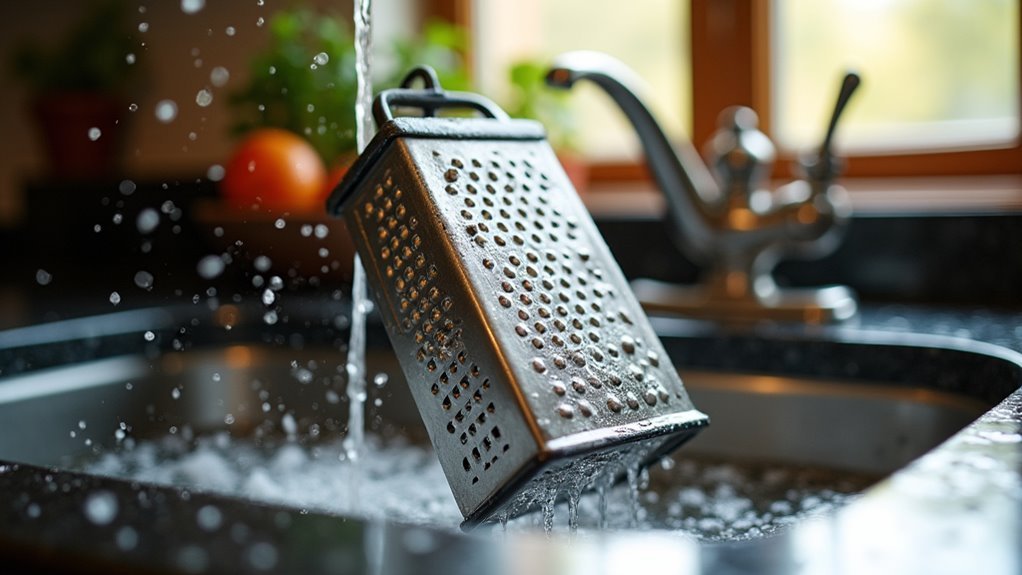
Step 1: Soak the cheese grater in warm soapy water for several minutes to loosen and soften any stuck cheese residue.
Step 2: Obtain a nylon brush with short, mobile bristles, which can be purchased for around $1.99 at most dollar stores.
Step 3: Hold the grater by its handle and use the brush to gently scrub both the inside and outside surfaces of the grater, avoiding direct finger contact with the sharp edges.
Step 4: Apply a light circular motion with the brush on the outside of the grater to effectively dislodge debris without damaging the cutting blades.
Step 5: Rinse the grater under high-pressure water to flush away all loosened particles.
Step 6: Repeat the scrubbing and rinsing process if any stubborn residue remains.
Step 7: Carefully inspect the grater for any remaining food particles that might be stuck in the holes.
Step 8: Dry the grater thoroughly with a clean towel or air dry to prevent rusting and future buildup.
Final Thoughts
Why do the simplest kitchen tools often cause the biggest headaches?
We think the cheese grater falls into this category!
With a good brush and a bit of soaking, though, you’ll save yourself a lot of frustration.
##
Cleaning a cheese grater doesn’t have to be the kitchen nightmare many of us dread.
By tackling the job immediately after use, using the right tools like silicone spatulas or brushes (knowing they’ll eventually need replacement), and exploring alternatives to the dishwasher, you can extend the life of your grater while making cleanup much less frustrating. Remember that prevention is your best strategy—a quick rinse or oil spray before grating can make all the difference. Your future self will thank you for those extra few seconds of preparation when cleanup time arrives.
Time is your strongest ally in the cheese grater battle—clean immediately and choose your tools wisely.
Whether you opt for the soap-soaking method, employ a dedicated cleaning brush, or try one of our clever hacks, the key is finding a routine that works for your specific grater and lifestyle. A well-maintained grater not only performs better but also makes your time in the kitchen more enjoyable.