Some of the links in this article may be affiliate links. If you make a purchase through these links, we may earn a small commission at no extra cost to you. Thank you.
How to Clean a Rusty Gas Tank Motorcycle
Rust in a motorcycle gas tank is a common, frustrating problem. It’s not just an unsightly mess; it’s a serious issue that can contaminate your fuel, leading to engine damage, poor performance, and even costly repairs. The corrosion process can create flaky rust, sludge, and varnish, which can clog fuel injectors, lines, and carburetors. Furthermore, existing rust can aggressively accelerate when fuel is present, creating a vicious cycle. Ignoring the problem won’t make it disappear – it will only get worse. This guide will walk you through the process of safely and effectively removing rust and restoring your gas tank.
Before you even think about tools or chemicals, let’s address the foundational aspects. First, understand that complete rust removal isn’t always possible, especially with deeply embedded corrosion. Your goal should be to reduce the rust to a manageable level and protect the tank’s metal from further degradation. Secondly, safety is paramount. Work in a well-ventilated area, wear appropriate personal protective equipment (PPE) – gloves, eye protection, and potentially a respirator – and follow all product instructions carefully. Finally, acknowledge the potential for damage. Gas tank liners (foam or rubber) are notoriously difficult to replace. If you’re not comfortable with potential damage, consider seeking professional restoration services.
Here’s a breakdown of what you’ll need to succeed:
- Safety Gear: Gloves, eye protection (safety glasses or goggles), and a respirator – especially if using strong chemicals.
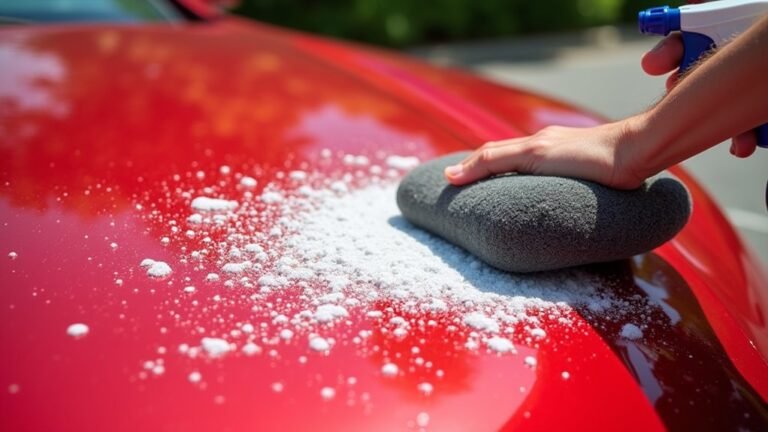
- Cleaning Chemicals: Start with milder solutions like diluted vinegar or baking soda. For heavier rust, you might need a specialized tank cleaner (research thoroughly and follow instructions precisely). Avoid using harsh abrasive cleaners.
- Plastic Scrapers & Brushes: Soft plastic scrapers are ideal for gently lifting rust. A variety of brushes – nylon, brass, and detailing brushes – will allow you to reach all areas of the tank.
- Clean Rags & Microfiber Towels: Lots of them! You’ll need them for wiping, drying, and polishing.
- Fuel Tank Liners (Optional): If the tank’s liner is severely damaged, you’ll need to purchase a replacement. Ensure you get the correct size and type for your motorcycle model.
Things to Avoid When Cleaning a Rusty Gas Tank Motorcycle
Several mistakes can quickly escalate the problem. First, avoid aggressive scrubbing with steel wool or wire brushes, as these will only create more surface damage and spread the rust. Next, don’t soak the tank in strong solvents for extended periods, as this can damage the metal. Consider carefully when using highly acidic solutions, and always neutralize them with baking soda and water after their use. Avoid using abrasive cleaners, like sandpaper, as these will severely damage the metal and make the problem far worse. Finally, don’t assume that the tank is completely empty. Even a small amount of fuel remaining can accelerate the rust process.
Steps
Let’s break down the cleaning process into manageable steps. Remember, patience is key. Rushing the process can lead to mistakes and further damage:
- Step 1: Empty the Tank (As Much as Possible). Use a siphon pump to remove as much fuel as you can. Leave a small amount in the tank to prevent debris from scratching the inner surface.
- Step 2: Initial Cleaning – Gentle Removal. Use a plastic scraper to loosen surface rust. Employ nylon or brass brushes to gently scrub the affected areas.
- Step 3: Apply Cleaning Solution. Diluted vinegar or a tank-specific cleaner (following the product’s instructions) is your friend. Apply the solution evenly to the tank’s interior. Allow it to dwell for the time recommended by the product (usually 15-30 minutes).
- Step 4: Agitation & Scrubbing (Moderate). After the dwell time, use a brush to work the cleaner into the rust. For stubborn areas, apply a little more cleaner or a small amount of compressed air.
- Step 5: Thorough Rinse. Rinse the tank completely with clean water. Multiple rinses are better than one.
- Step 6: Drying. This is critical. Use clean rags and microfiber towels to dry the interior completely. Compressed air can also be extremely helpful, especially in hard-to-reach areas.
- Step 7: Inspection and Repeat (If Necessary). Once dry, thoroughly inspect the tank. If rust remains, repeat steps 3-6. For severely rusted tanks, a professional cleaning service may be the best option.
Final Thoughts
Cleaning a rusty gas tank motorcycle is a labor of love, but a crucial one for preserving your machine’s performance and longevity. You’ve now learned a fundamental method for tackling this common issue. Remember, the key is a gentle, methodical approach. Don’t be discouraged if the rust isn’t completely gone on your first attempt; persistence and careful execution will yield the best results. By understanding the potential pitfalls and following these steps, you’ve taken a significant step toward protecting your motorcycle. You’ve invested time and effort into a component that’s often overlooked, and that’s a valuable contribution to the health of your vehicle.