We’ve all had sticky or gritty laptop keys that just don’t work right anymore. It’s crazy how much dust, food bits, and other stuff can get trapped under our keys! Most of us wait until typing becomes super annoying before we do anything about it. But don’t worry – cleaning under those keys isn’t as scary as you might think.
Some of the links in this article may be affiliate links. If you make a purchase through these links, we may earn a small commission at no extra cost to you. Thank you.
According to Dell’s Tech Support Team, “Regular keyboard cleaning can extend the life of your laptop and prevent keys from sticking or malfunctioning.”
The good news is you don’t need fancy tools or special skills to get your keyboard working smoothly again. With just a few basic items from around your house and a little bit of care, you can make your keyboard feel like new. Think of it like cleaning under your couch cushions – it’s simple once you know how to do it safely.
Dusty Keys, Quick Rescue
Battling dusty laptop keys doesn’t have to be a major ordeal.
We’ve found a few quick solutions that work well in most cases.
First, turn off your laptop and unplug it—safety first!
Then, try gently shaking your inverted laptop over a towel.
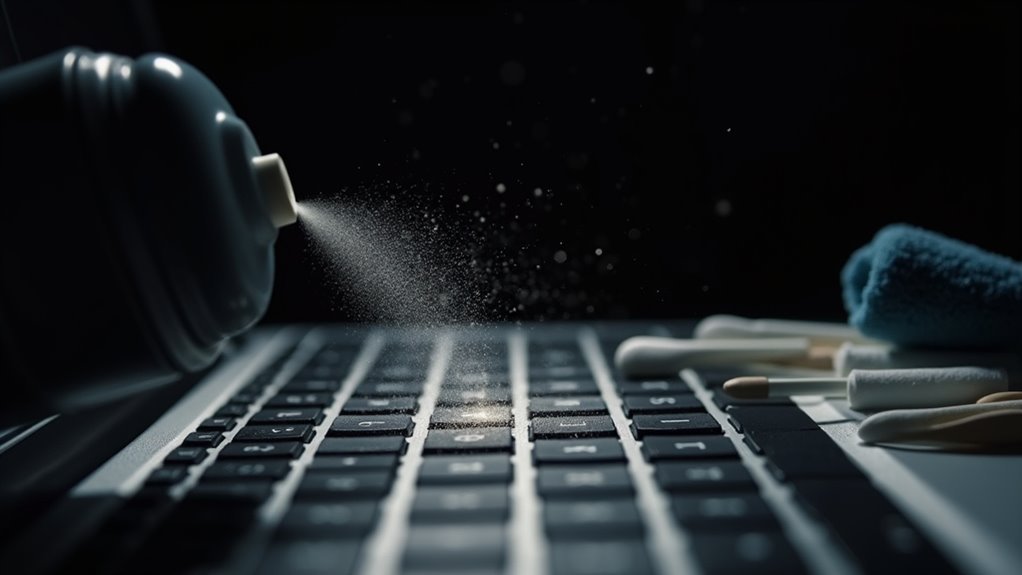
For stubborn dust, we recommend using compressed air in short bursts, keeping the can upright. Regular maintenance of your keyboard can help prevent dust accumulation.
Perhaps clean every few months to stay ahead of buildup.
##
We’ve found a really helpful YouTube video for cleaning under laptop keys, shared by a user in our community that’s gotten hundreds of votes.
The video at http://www.youtube.com/watch?v=2Kg6EfuR-6Y shows exactly how to safely remove and clean MacBook keys without damaging those tricky butterfly mechanisms.
I think it’s worth checking out before attempting any keyboard cleaning yourself, as it covers both what to do (like using a spudger properly) and what to avoid (like skipping the essential step of powering down your laptop first). Regular maintenance keeps the MacBook screen clear and protected.
Things to Do When Cleaning Under laptop keys
Cleaning under laptop keys is an essential maintenance task that can extend your keyboard’s lifespan and improve typing experience.
When debris, dust, and spills accumulate beneath keys, they can cause sticking, unresponsiveness, or complete failure of individual keys.
A thorough cleaning underneath the keycaps can often resolve these issues without requiring expensive repairs or replacements, but the process requires patience and careful attention to detail to avoid damaging your keyboard’s delicate mechanisms.
- Document your keyboard layout by taking a clear photo before removing any keys, ensuring you can return them to their correct positions afterward.
- Use appropriate tools like a flat Framework Spudger to gently pry keys off without applying excessive force that could damage the underlying mechanisms.
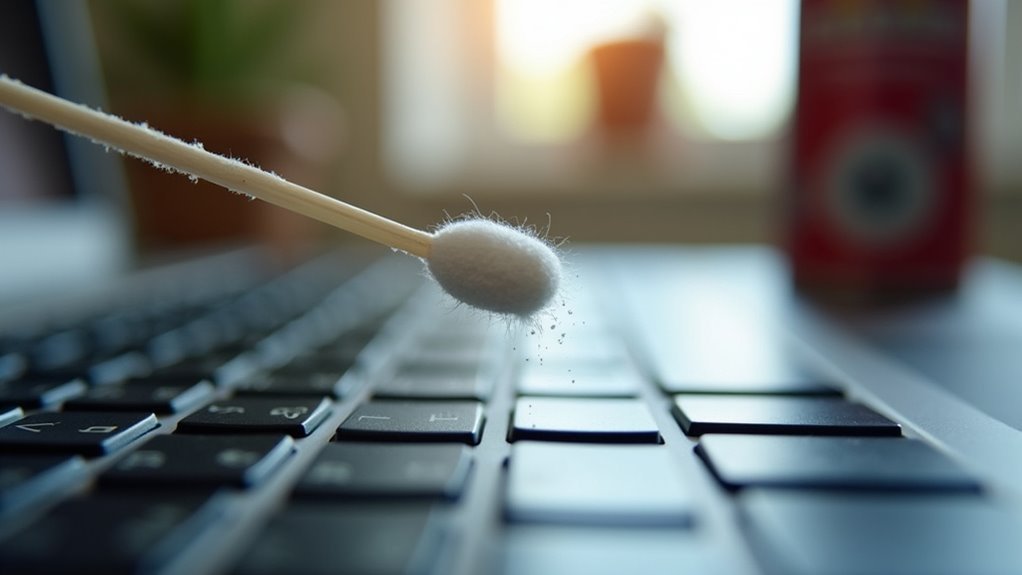
- Apply minimal isopropyl alcohol on cotton swabs to clean sticky residue, being careful not to allow any liquid to drip into the internal components.
- Remove loose debris and dust with short bursts of compressed air, keeping the can upright to prevent propellant from damaging keyboard components.
- Allow adequate drying time of 2-4 hours before reinstalling keys to prevent moisture-related damage to electronic components.
- Reinstall keys correctly by first hooking them into the southern edge of the butterfly mechanism before pressing down on the northern edge until they click into place.
- Consult model-specific resources online if you’re uncertain about whether your laptop keys are safely removable.
- Seek professional assistance if you encounter any resistance or complications during the key removal or replacement process.
Things to Avoid When Cleaning Under laptop keys
Cleaning under laptop keys is a delicate process that requires careful attention to avoid potentially costly damage to your device.
While regular maintenance can extend keyboard life and improve typing performance, using improper techniques or materials can lead to permanent damage that may require professional repair or even full keyboard replacement.
- Bleach-containing products – These harsh chemicals will damage key paint and lettering, permanently affecting appearance and readability.
- Cleaning while powered on – Always disconnect power and shut down your laptop to prevent electrical shorts and accidental keystrokes that could damage components.
- Excessive force when removing keys – Delicate butterfly mechanisms and stabilizers break easily; gentle pressure is essential when removing keycaps.
- Overly wet cleaning materials – Excess moisture can seep into internal components, causing corrosion and short circuits that may not be immediately apparent.
- Improper key removal techniques – Check manufacturer guidelines for your specific model before attempting to remove keys, as incorrect methods can break plastic tabs and mounting mechanisms.
- Compressed air at incorrect angles – Direct airflow parallel to the keyboard surface, not downward, to avoid pushing debris deeper into the keyboard mechanism.
- Abrasive cleaning tools – Rough materials can scratch key surfaces and damage sensitive components beneath the keys.
- Isopropyl alcohol directly on keys – Apply to a cloth first, as direct application can dissolve adhesives and damage plastic components.
Steps
Properly cleaning under laptop keys requires patience and precision to avoid damaging the delicate mechanisms that make modern keyboards function.
Dust, crumbs, and debris can accumulate beneath keys over time, affecting typing performance and potentially causing keys to stick or become unresponsive.
The following systematic approach will help you safely clean under your laptop keys without risking damage to your device.
Step 1: Turn off and unplug your laptop completely to prevent any electrical issues during cleaning.
Step 2: Gently turn your laptop upside down over a towel and carefully shake it to dislodge any loose particles.
Step 3: Take a clear photograph of your keyboard layout for reference before removing any keys.
Step 4: Use a specialized tool like a Framework Spudger to carefully pry off the keycap, starting from the correct edge according to your laptop model.
Step 5: Lightly dampen a cotton swab with isopropyl alcohol and gently clean the exposed area under the removed key.
Step 6: Allow the cleaned area to dry completely before attempting to reattach the key.
Step 7: Reattach the keycap by first sliding the hooks into the southern edge of the mechanism, then pressing down on the northern edge until it clicks securely in place.
Final Thoughts
Taking the time to follow these careful steps will leave you with a cleaner, more responsive keyboard that performs like new.
Regular maintenance helps avoid those frustrating sticky keys that can make typing a nightmare.
Remember, though, if you’re uncertain about removing keys yourself, it’s perhaps better to seek professional help.
We think prevention is key—a little compressed air every few weeks might save you from more intensive cleaning later on.
##
Cleaning under your laptop keys doesn’t have to be an intimidating task.
By following these simple steps—powering down your device, using compressed air strategically, carefully removing keycaps when necessary, cleaning with isopropyl alcohol, and allowing sufficient drying time—you can maintain a clean and functional keyboard.
Regular maintenance prevents the buildup of dust, crumbs, and debris that can impair key functionality over time.
What might seem like a minor annoyance today could develop into a more serious issue if neglected.
Take the time every few months to give your keyboard the attention it deserves.
Your laptop is an investment, and these preventative cleaning measures will help extend its lifespan and keep it performing at its best.
Don’t wait until keys start sticking or failing—incorporate keyboard cleaning into your regular device maintenance routine and enjoy a smoother, more responsive typing experience for years to come.