Cleaning your ultrasonic humidifier isn’t as hard as you might think, even if it seems tricky at first. Over time, minerals from water build up inside the device, which can stop it from working well. Think of it like the chalky stuff you see around your sink faucet – that’s what’s happening inside your humidifier too.
Some of the links in this article may be affiliate links. If you make a purchase through these links, we may earn a small commission at no extra cost to you. Thank you.
According to Robert McDonald, Senior Product Engineer at Honeywell, “The most common reason humidifiers stop working effectively is mineral buildup from hard water, which can be prevented with regular cleaning and using distilled water instead of tap water.”
Keeping your humidifier clean helps it work better and last longer, and anyone can do it with some basic household items. The key is knowing the right steps to clean it without breaking any of the parts inside. Once you learn how, you’ll find it’s as simple as washing your dishes.
Preventing Mineral Buildup
The three biggest enemies of your ultrasonic humidifier are lime, calcium, and mineral deposits.
We’ve found that using distilled or demineralized water is your best first line of defense, especially if you live somewhere with hard water.
Using distilled water isn’t just a suggestion—it’s essential protection against mineral buildup in hard water areas.
Remember to replace those demineralization cartridges every 60-90 days and clean the ultrasonic disk weekly with diluted vinegar. Regular cleaning of the humidifier ensures healthy air quality, which helps prevent harmful bacteria and mineral buildup.
I think daily emptying and drying of the tank really helps prevent problems too.
##
We’ve found that proper cleaning of an ultrasonic humidifier isn’t just about maintenance—it’s essential for your health and the device’s longevity. Regular cleaning creates a safer and more efficient home environment, especially since heater maintenance is crucial for preventing potential hazards. Let’s walk through some important do’s and don’ts when cleaning these devices, including specific steps that’ll make the process easier.
I think you’ll find these techniques helpful whether you’re a first-time user or someone who’s looking to improve their cleaning routine.
Things to Do When Cleaning An ultrasonic humidifier
Cleaning an ultrasonic humidifier properly is essential to maintain its efficiency and extend its lifespan.
Regular maintenance prevents mineral buildup, which can affect performance and potentially spread contaminants into the air.
The cleaning process requires careful attention to the sensitive components, particularly the ultrasonic disk that creates the fine mist.
- Empty the tank completely: Remove all water and any demineralization cartridge before starting the cleaning process.
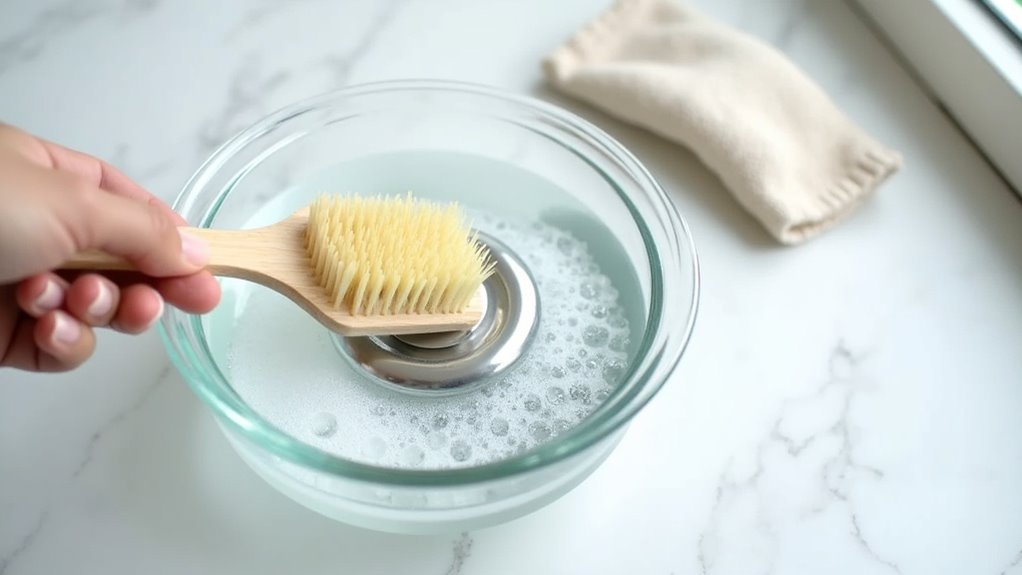
- Prepare cleaning solution: Fill the tank just over halfway with water and add 2 tablespoons of white vinegar to create a natural descaling solution.
- Soak components: Allow the vinegar-water mixture to sit for 20 minutes to effectively loosen mineral deposits and buildup.
- Clean the oscillator: Gently wipe the oscillator in the base using a soft cloth while the cleaning solution is present to avoid damaging this sensitive part.
- Treat the ultrasonic disk: Soak the disk in diluted white vinegar for 4-5 minutes, then carefully clean it with the appropriate tool, avoiding harsh scrubbing.
- Rinse thoroughly: Wash all components with clean water to remove any vinegar residue that could affect performance.
- Dry completely: Use a soft cloth to dry all parts before reassembling to prevent water damage and mold growth.
- Reassemble properly: Put all components back together correctly to make sure the humidifier functions efficiently after cleaning.
Things to Avoid When Cleaning An ultrasonic humidifier
When cleaning your ultrasonic humidifier, there are several essential practices to avoid in order to maintain the device’s functionality and prevent potential hazards.
Proper maintenance guarantees ideal performance and longevity, but certain cleaning approaches can cause significant damage or even create dangerous situations.
Understanding these risks will help you safely care for your humidifier while preserving its effectiveness.
- Harsh Chemical Cleaners: Bleach and ammonia should never be used on ultrasonic humidifiers as they can deteriorate plastic components and seals, potentially contaminating the unit and compromising its structural integrity.
- Mixing Cleaning Agents: Never combine vinegar with bleach during the cleaning process, as this creates toxic chlorine gas that can cause serious respiratory issues or even prove fatal if inhaled.
- Aggressive Disk Cleaning: The ultrasonic disk requires gentle handling; scrubbing it forcefully can damage its delicate surface, reducing mist output or completely disabling the humidifier’s primary function.
- Submerging Electronic Parts: Keep the base unit, power components, and oscillator away from water immersion, as liquid contact with these elements can cause electrical shorts and permanent damage.
- Running Solutions Through the System: Avoid operating the humidifier with cleaning solutions inside, as residues may remain in the internal mechanisms, affecting air quality and potentially creating harmful buildups over time.
Steps
Regular cleaning of your ultrasonic humidifier is essential to prevent mineral buildup and bacterial growth that can affect performance and air quality.
The cleaning process involves using a simple vinegar solution to dissolve mineral deposits that naturally accumulate from tap water.
Following these steps every 1-2 weeks will help maintain your humidifier’s efficiency and extend its lifespan.
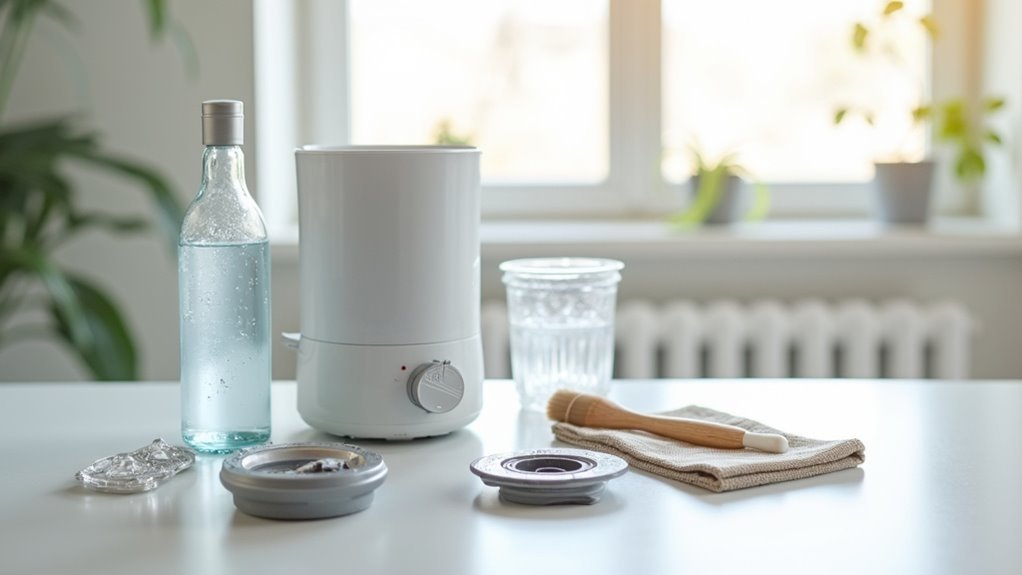
Step 1: Empty all water from the humidifier tank and remove the demineralization cartridge if your model has one.
Step 2: Fill the tank approximately half-full with clean water, then add 2 tablespoons of white vinegar.
Step 3: Pour some of the vinegar-water solution into the base where the oscillator is located.
Step 4: Replace the water cap, gently shake the tank, and let both the tank and base sit for 20 minutes.
Step 5: Use a soft cloth to carefully clean the oscillator in the base, taking care not to scratch or damage it.
Step 6: Empty the vinegar solution from both the tank and base after the 20-minute soaking period.
Step 7: Wipe down all surfaces with a cloth dampened with vinegar solution to remove any remaining residue.
Step 8: Rinse all components thoroughly with clean water to remove any vinegar smell.
Step 9: Allow all parts to dry completely before reassembly.
Step 10: Reassemble the humidifier, ensuring all components are clean and dry before adding fresh water for use.
Final Thoughts
Maintaining your ultrasonic humidifier might seem like a chore, but the benefits far outweigh the effort involved.
Weekly cleaning with diluted vinegar keeps mineral deposits at bay and prevents potentially harmful microbial growth.
##
Maintaining your ultrasonic humidifier through regular cleaning is essential for both its longevity and your health.
By following these simple steps—soaking with a white vinegar solution, gently cleaning the oscillator and ultrasonic disk, thorough rinsing, and complete drying—you’ll prevent mineral buildup and guarantee ideal performance.
Remember that prevention is just as important as cleaning: using distilled water greatly reduces maintenance needs, while replacing demineralization cartridges every 60-90 days keeps your unit running efficiently.
A clean humidifier not only functions better but also provides cleaner, healthier air for your home.
Set a weekly reminder for basic maintenance and monthly for deeper cleaning.
Your respiratory health, the air quality in your home, and the lifespan of your investment will all benefit from these simple care routines.
With just a few minutes of attention each week, you’ll breathe easier knowing your ultrasonic humidifier is working exactly as it should.