Our laptops can start to act up when their cooling fans get noisy and sound like small aircraft taking off. Most of us know the feeling of worry when our computers get too hot or begin running slowly because of dust collecting inside. While it’s tempting to ignore these warning signs, cleaning your laptop fan is easier than you might think. According to Dell Technologies Support, “Regular cleaning of your laptop’s cooling system can extend its life and maintain optimal performance.” Taking care of your laptop’s fan is a simple job that can help your computer run much better.
Some of the links in this article may be affiliate links. If you make a purchase through these links, we may earn a small commission at no extra cost to you. Thank you.
Dusty Fans Degrade Performance

Dust is often the culprit.
When it accumulates on fan blades and cooling fins, airflow gets restricted, preventing proper heat dissipation.
We’ve seen cases where fans barely spin at startup, quickly leading to system freezes.
Even partial cleaning isn’t enough—residual dust continues to compromise cooling efficiency, forcing CPUs and GPUs into thermal throttling.
Performance suffers as a result. Regular maintenance is essential to prevent overheating and costly repairs.
##
YouTube tutorials have become our go-to resource when tackling laptop fan cleaning.
We’ve found countless step-by-step videos showing exactly what to do (like using compressed air) and what to avoid (such as excessive liquid or forcing components).
Perhaps the most helpful aspect is seeing real people demonstrate the process from start to finish, making us feel more confident about maintaining our own devices. Regular maintenance keeps the MacBook screen clear and protected, and similar principles apply when cleaning laptop fans.
Things to Do When Cleaning A fan on a laptop
Cleaning your laptop’s fan is an essential maintenance task that prevents overheating and extends your computer’s lifespan.
When dust accumulates in the cooling system, it restricts airflow and forces the fan to work harder, potentially leading to component damage or system failure.
A properly maintained fan not only runs quieter but also allows your laptop to operate at ideal temperatures, preventing thermal throttling that can slow performance during demanding tasks.
- Power down completely – Shut down your laptop and unplug the power adapter to eliminate electrical hazards before beginning any cleaning procedure.
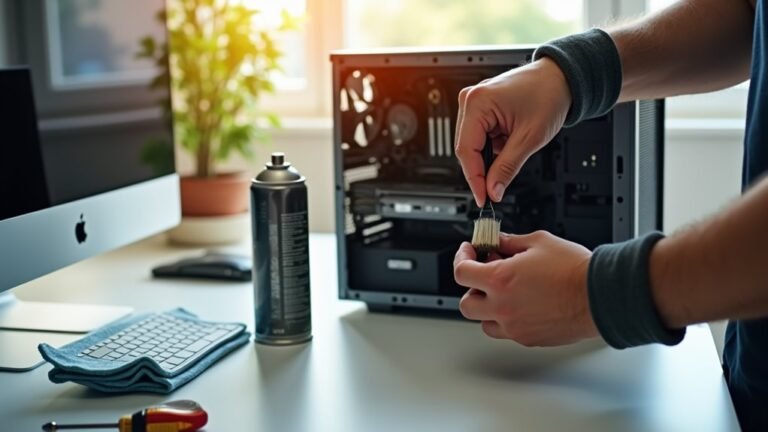
- Gather proper tools – Collect compressed air, cotton swabs, paper towels, a small Phillips screwdriver (preferably magnetic), and optionally a shop vacuum with a narrow nozzle.
- Access the fan area – Remove the battery if possible and locate access panels on the bottom of your laptop; unscrew the RAM or maintenance cover to reach the cooling system.
- Apply compressed air strategically – Hold the can upright and use short bursts to blow dust from the fan blades and heat sink fins, being careful not to spin the fan too quickly with air pressure.
- Use gentle physical cleaning – For stubborn debris, lightly dampen (not soak) a cotton swab or paper towel and carefully wipe the fan blades and surrounding areas.
- Alternate suction and pressure – If available, use a shop vacuum to help extract dust while using compressed air, creating a more effective cleaning cycle.
- Reassemble carefully – Make sure all tiny screws are properly replaced and access panels are securely fastened before reconnecting the power and turning on your laptop.
Things to Avoid When Cleaning A fan on a laptop
When cleaning your laptop’s cooling system, proper technique is essential to prevent damage and guarantee ideal performance.
Many common approaches can actually worsen the situation or put your device at risk, leading to overheating issues or permanent hardware damage if not addressed correctly.
- Reversing the fan direction – This ineffective method only dislodges some dust while leaving cooling fins clogged, resulting in poor overall temperature management.
- Cleaning while powered on – Always shut down your laptop and disconnect power before cleaning to avoid electrical risks and potential component damage.
- Relying solely on increasing fan speed – This provides minimal help in removing accumulated dust and doesn’t address the underlying buildup on cooling components.
- Using a vacuum without proper technique – Direct suction on fan ports without alternating blowing can push dust deeper into the system or fail to clear clogs effectively.
- Working without proper tools – Skipping compressed air or appropriate cleaning supplies leads to incomplete dust removal and continued cooling inefficiency.
- Opening the laptop without research – Different laptop models have varying disassembly requirements; attempting to open without proper knowledge may damage components.
Steps
A dirty laptop fan can lead to overheating issues, reduced performance, and even permanent damage to your computer’s internal components.
Dust and debris naturally accumulate over time, restricting airflow and preventing proper cooling.
Regular maintenance by cleaning your laptop fan can extend your device’s lifespan and maintain peak performance.
Following these simple steps will help you safely clean your laptop fan without risking damage to sensitive components.
Step 1: Shut down your laptop completely and disconnect it from any power source.
Step 2: Remove the laptop battery to make sure there’s no electrical current flowing through the system.
Step 3: Locate and unscrew the RAM cover and any plastic panels that provide access to the fan area.
Step 4: Check carefully for any hidden screws that might secure these panels to avoid damaging clips.
Step 5: Hold the can of compressed air upright and spray short bursts around the fan blades and heat sinks.
Step 6: Use a damp (not wet) paper towel to gently wipe the fan blades if dust remains.
Step 7: For stubborn dirt, use cotton swabs to clean between the fan blades.
Step 8: Allow any moisture to dry completely before reassembly.
Step 9: Replace all covers and secure with the screws you removed earlier.
Step 10: Reinsert the battery and connect to power.
Step 11: Power on the laptop and listen to make sure the fan is operating correctly.
Final Thoughts
Following the steps above will help you safely clean your laptop fan, but there’s more to think about beyond the basic procedure.
##

Proper laptop fan maintenance is essential for extending your device’s lifespan and maintaining efficient performance.
While reversing the fan might seem like a quick fix, it’s simply not effective enough to address the root causes of overheating.
A thorough cleaning approach using compressed air and appropriate tools will yield much better results by clearing dust from both the fan blades and the vital cooling fins.
Gentle compressed air cleaning removes stubborn dust from both fan components and cooling fins, restoring optimal thermal performance.
If you’re comfortable with basic disassembly, taking apart your laptop to access the fan assembly directly can resolve persistent issues—particularly when poor connections are involved.
Just remember to document each step carefully and handle components gently during the process.
For those less confident with DIY repairs, professional cleaning services offer a reliable alternative that can save you from potentially costly mistakes.
Don’t wait until your laptop is shutting down or freezing regularly before addressing fan issues.
Regular maintenance, ideally every 6-12 months depending on your environment, can prevent performance degradation and extend your laptop’s useful life.
Take action today to give your device the care it deserves—your future self will thank you when your laptop continues running cool and quiet for years to come.