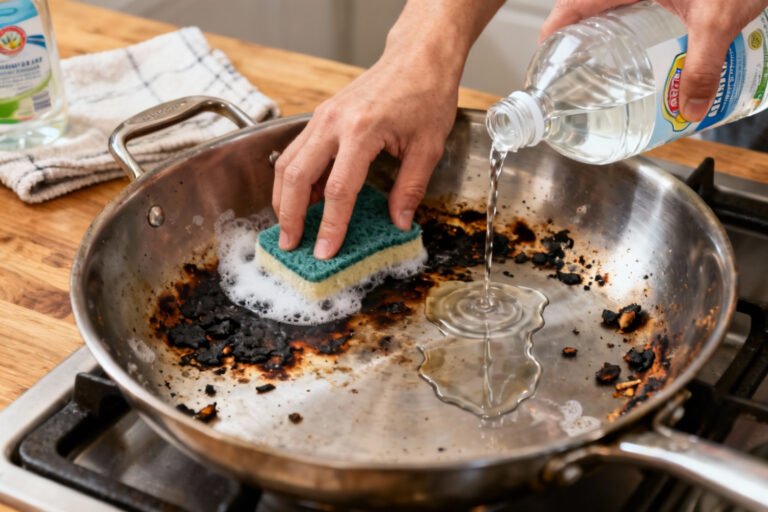
Sheet pans are probably the hardest-working piece of kit in your kitchen — and one of the trickiest to get truly clean. The good news? You don’t need expensive products or hours of scrubbing. Rinse the pan while it’s still warm, scrub with dish soap, and tackle stubborn spots with a baking soda paste. That covers 95% of cleaning jobs. Here’s the full step-by-step breakdown, plus how to handle seriously baked-on grease when regular washing just won’t cut it.
Some of the links in this article may be affiliate links. If you make a purchase through these links, we may earn a small commission at no extra cost to you. Thank you.
Key Takeaways
- Act fast: a warm pan is dramatically easier to clean than a cold, hardened one
- Baking soda is your best friend for burnt-on food — mildly abrasive without scratching the surface
- White vinegar dissolves grease and mineral deposits — use it as a targeted soak, not a daily rinse
- Material matters: aluminium, stainless steel, and nonstick pans each need a slightly different approach
What Do You Need to Clean a Sheet Pan?
You likely already own everything you need. No specialist cookware cleaner is required. The most effective sheet pan cleaning kit is built entirely from pantry and kitchen staples that cost pennies per use.
- Hot water: the starting point for almost every method. Heat alone softens dried-on food and loosens surface grease before you’ve reached for a single cleaning agent.
- Degreasing dish soap: choose a formula designed specifically for cutting grease — the difference in performance compared to a standard soap is significant, particularly on fatty residues.
- Baking soda: baking soda has a mildly alkaline pH of around 8.3, which makes it effective at breaking down acidic food residues. It also functions as a gentle mechanical abrasive without scratching metal surfaces.
- White vinegar: at roughly 5% acetic acid concentration, white vinegar cuts through grease and dissolves the mineral deposits responsible for white haze on metal pans.
- Non-scratch sponge or soft brush: physical scrubbing does the real heavy lifting. A non-abrasive pad protects the pan surface while still shifting residue efficiently.
- Clean towel or paper towels: for thorough drying immediately after washing — crucial for preventing rust on any metal pan.
What Should You Avoid When Cleaning a Sheet Pan?
A few very common mistakes can make cleaning harder — or permanently damage the pan you’re trying to restore. Knowing what not to do is just as important as knowing the right technique.
- Steel wool and abrasive scouring pads: these leave permanent scratches on nonstick coatings and can pit the surface of aluminium pans. Once the nonstick layer is physically damaged, food sticks more — not less.
- Bleach and harsh chemical cleaners: bleach can discolour and weaken metal cookware surfaces and may produce unpleasant fumes when it comes into contact with food residue. Stick to food-safe cleaning agents throughout.
- Extended soaking in plain hot water alone: counterintuitively, soaking a pan for several hours in water alone can bake residue further into the surface. A targeted soak with baking soda or vinegar is far more effective and faster.
- The dishwasher (for most pans): most aluminium sheet pans are not dishwasher-safe. The harsh detergent and sustained high heat cause irreversible discolouration, surface pitting, and warping over time.
- Skipping the drying step: leaving a wet metal pan to air-dry significantly increases the risk of rust spots forming, especially along the edges, corners, and any exposed seams.
How Do You Clean a Sheet Pan Step by Step?
This six-step method handles everything from a light everyday clean through to genuinely stubborn, baked-on grease. Work through as many steps as your pan needs — often, steps one and two are more than enough.
Step 1: Rinse While the Pan Is Still Warm
As soon as the pan is cool enough to handle safely, rinse it under warm running water. This removes the loose food particles before they have the chance to harden and bond to the surface. A warm pan is your biggest practical advantage — don’t waste it by leaving the pan to sit while you clear the table.
Step 2: Scrub with Dish Soap
Add a generous squeeze of degreasing dish soap to the wet pan. Using a non-scratch sponge or soft brush, scrub the entire surface in circular motions — pay particular attention to the corners and raised edges where grease tends to accumulate. Apply firm but controlled pressure; excessive force rarely improves results and risks damaging the surface. Rinse thoroughly and assess what remains.
Step 3: Make a Baking Soda Paste for Stubborn Spots
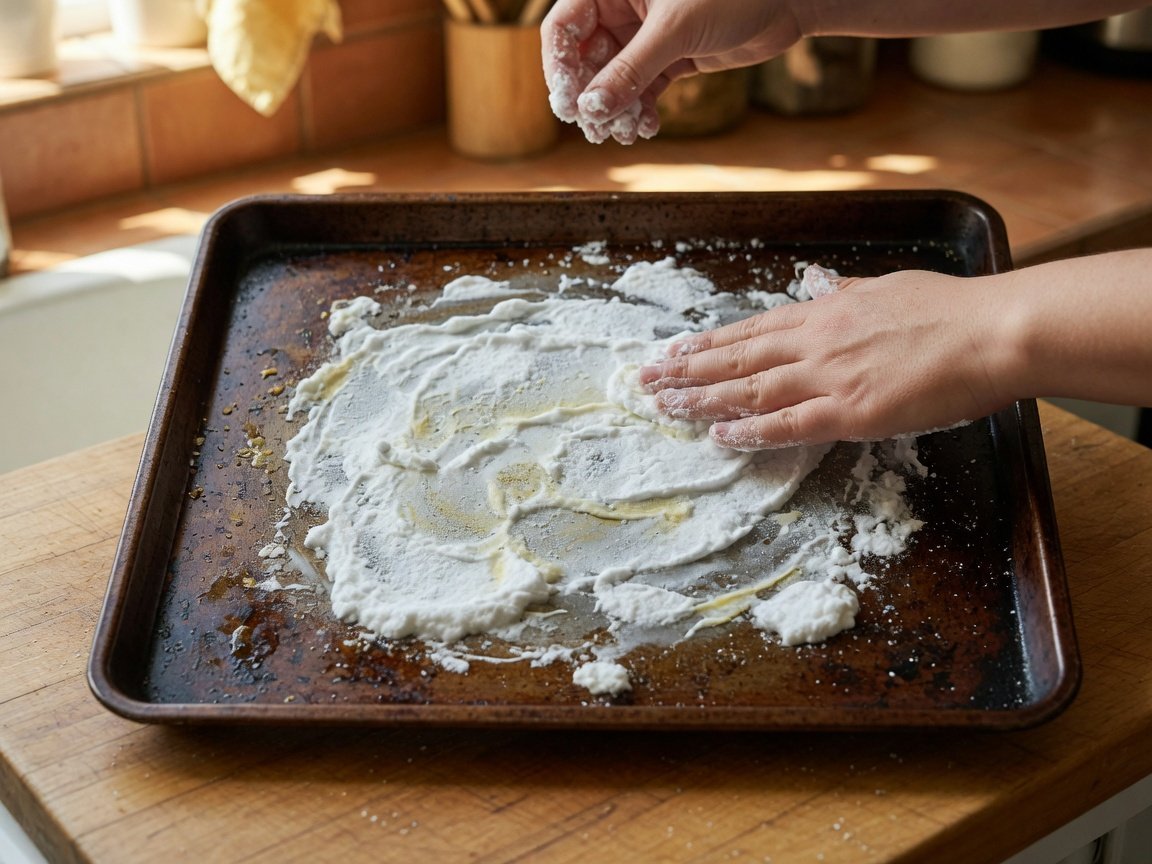
Mix baking soda with just enough water to form a thick paste — roughly two parts baking soda to one part water works well. Spread it directly onto the stubborn areas and leave it to sit for 10–15 minutes. The alkaline chemistry of baking soda actively works to loosen and lift carbonised food residue during this contact time. Scrub with your non-scratch sponge using small circular motions, then rinse thoroughly.
Step 4: Add Vinegar for Extra Grease Cutting (Optional)
If greasy residue remains after the baking soda treatment, pour about half a cup of white vinegar into the pan and let it sit for 15–30 minutes. The acetic acid in vinegar dissolves fatty residues and mineral deposits that dish soap alone struggles to shift. Swirl the vinegar around to coat the affected areas, then discard it before scrubbing. If you’re regularly dealing with particularly heavy buildup, the dedicated guide on cleaning a pan with burnt-on grease covers more intensive removal techniques worth knowing.
Step 5: Final Scrub and Rinse
After any soaking period, give the pan a final scrub with a clean sponge and warm soapy water. Work across the entire surface — not just the problem areas — to ensure all loosened residue is removed. Rinse thoroughly under running water until the water runs completely clear and there’s no detectable soapy film remaining. Any soap residue left on the surface can affect the taste of food in subsequent uses.
Step 6: Dry Immediately and Completely
This step is non-negotiable for metal pans. Dry the sheet pan immediately with a clean, dry towel, paying attention to the corners, rim, and any textured areas. For stainless steel and aluminium pans, placing the pan in a warm oven at around 100°C for 5 minutes effectively evaporates any remaining moisture from hard-to-reach areas. Storing a damp pan is the single most common cause of rust formation and surface degradation.
How Do You Deep Clean a Sheet Pan with Heavy Discolouration?
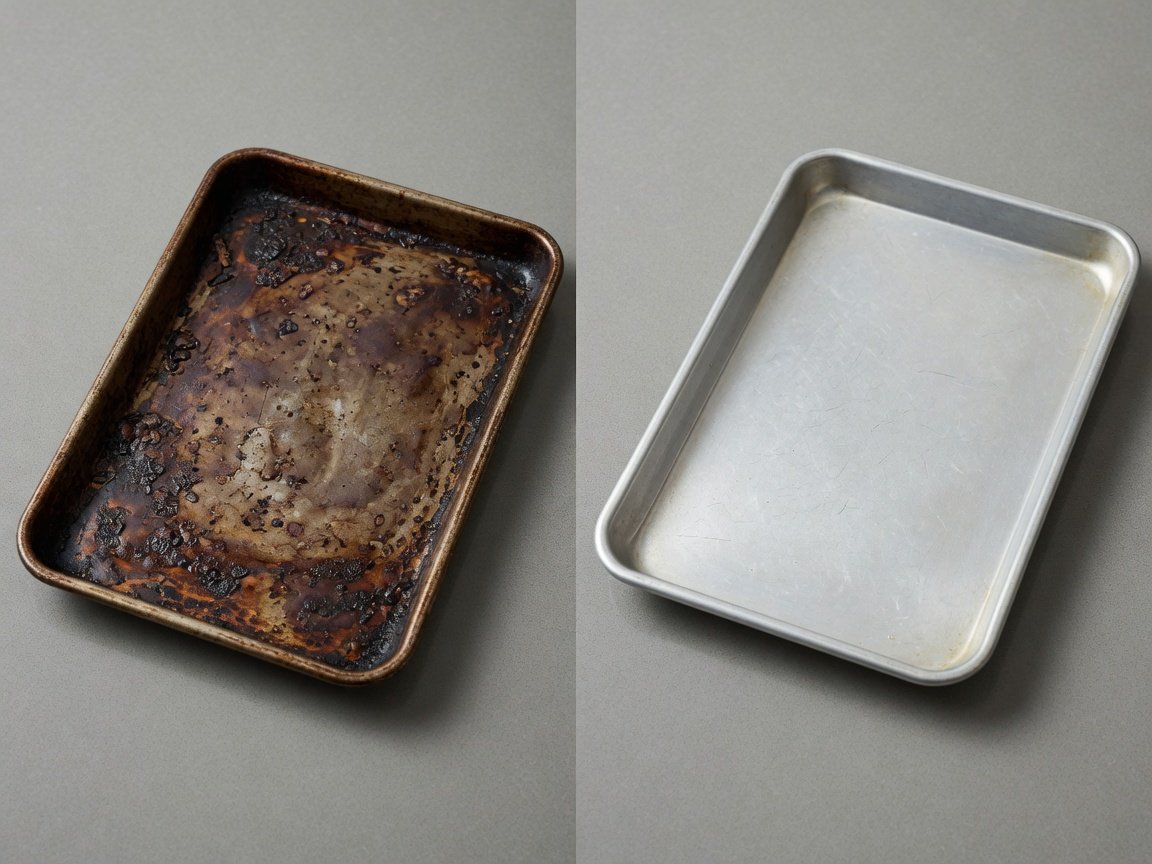
Even with consistent washing after every use, sheet pans build up layers of polymerised grease over time — that dark brown or near-black coating that seems permanently baked into the surface. This isn’t just a cosmetic issue. Thick buildup creates uneven heat distribution across the pan, which affects how your food cooks and browns. A targeted deep clean every four to six weeks restores both appearance and performance.
For a deep clean, combine baking soda and white vinegar directly in the pan. Sprinkle a generous, even layer of baking soda across the entire surface, then pour white vinegar over it — the mixture will fizz immediately as the two react. This reaction produces a mild carbonic acid that penetrates and actively lifts the polymerised grease layer from below. Leave the mixture to work for 30–60 minutes, then scrub firmly with a non-scratch pad and rinse completely.
For extremely stubborn cases, a paste made from baking soda and standard 3% hydrogen peroxide (available from any pharmacy) outperforms the vinegar method. Apply a thick paste across the entire discoloured surface, cover the pan tightly with cling film to stop the paste drying out, and leave it overnight — a minimum of eight hours is ideal. The peroxide acts as a gentle oxidiser that chemically breaks down the polymerised carbon layer. Rinse thoroughly and repeat if necessary; very heavy, long-term buildup may need two or three treatments across consecutive nights.
Does the Cleaning Method Change Based on Pan Material?
Yes — and using the wrong method for your specific pan material can cause damage that’s impossible to reverse. Sheet pans come in three common materials, each with different heat tolerances, surface chemistry, and cleaning requirements.
Aluminium Sheet Pans
Aluminium is the most common sheet pan material for good reason — it’s lightweight, conducts heat exceptionally well, and is affordable enough to own several. However, aluminium is a reactive metal. Dishwasher detergent causes rapid surface oxidation, and strongly alkaline cleaners can discolour it if left in prolonged contact. Keep baking soda treatments to the 10–15 minute window and rinse promptly. If your aluminium pan has already developed a dull, greyish or chalky surface over time, that’s oxidation — the detailed guide on restoring aluminium oxidation covers the specific steps to bring the original finish back.
Stainless Steel Sheet Pans
Stainless steel is more durable and considerably less chemically reactive than aluminium, which means it tolerates slightly more aggressive cleaning approaches without surface damage. The baking soda and vinegar combination method works particularly well on stainless steel, and you can safely extend soaking times to an hour or more without risk. The surface is also more forgiving of a slightly firmer scrub. If you’ve genuinely burned food onto a stainless pan, the guide to removing burnt food from a stainless steel pan walks through the full restoration process in detail.
Nonstick Sheet Pans
Nonstick pans require the most careful handling of the three. Never use abrasive scrubbers, steel wool, metal utensils, or anything that creates friction against the coating — the nonstick layer is thin and physical abrasion removes it permanently. Stick to a soft sponge, mild dish soap, and warm (not boiling) water. Avoid leaving baking soda paste in contact with nonstick surfaces for extended periods, and treat the entire pan more gently throughout. The good news is that a well-maintained nonstick pan actually cleans up with the least effort of any sheet pan type. For a useful comparison on caring for other nonstick cookware, the approach used when cleaning a ceramic pan follows similar principles and is worth reading alongside this guide.
How Do You Prevent Sheet Pan Buildup in the First Place?
The best cleaning strategy is one you barely have to execute. A few consistent habits dramatically reduce how much effort each clean requires — and extend the working life of your pans by years.
- Line your pans whenever possible. Parchment paper and reusable silicone baking mats take the full impact of drips, spills, and caramelised sugars — leaving the pan underneath largely clean after even messy cooks. Silicone mats are rated for hundreds of uses and pay for themselves quickly.
- Clean after every single use. The difference between cleaning a pan the same day versus two days later is enormous in practice. Food residue that takes 30 seconds to remove while fresh can take 20 minutes after it has hardened and dried fully.
- Use the right amount of oil. Excess oil bakes onto the pan surface in layers with each use. Using just enough to coat your ingredients — rather than allowing it to pool on the pan — significantly slows the rate of polymerised grease buildup.
- Dry thoroughly before storage. Any moisture trapped during storage accelerates rust and surface degradation. Store pans standing vertically if possible — stacking them flat traps moisture between surfaces and promotes rust at contact points.
- Season your pan occasionally. Rubbing a very light coat of neutral vegetable oil onto a clean, dry metal sheet pan and baking it at 200°C for 20 minutes creates a thin protective layer. This makes future cleaning easier and slows the rate at which food bonds to the surface.
What Do Experienced Cooks Recommend?
Professional bakers and kitchen equipment specialists consistently highlight a few principles that home cooks tend to overlook. Temperature timing is the most frequently cited factor — the window between finishing cooking and starting to clean is the single biggest variable in how long the job takes. Culinary professionals generally agree that cleaning within 30 minutes of use is the threshold below which most pans clean up in under five minutes of active effort.
Pastry chefs advocate strongly for silicone baking mats over single-use parchment — not only for sustainability reasons, but because they reduce how often a deep clean is genuinely necessary. Many professional kitchen protocols include a light re-seasoning of sheet pans after each deep clean to maintain a consistent, non-reactive cooking surface — a habit that’s equally practical in a home kitchen and costs only a few minutes of time.
Kitchen equipment specialists also note that pan quality directly affects cleaning ease. Heavier-gauge pans resist warping under high heat, keeping the surface flat and making scrubbing more efficient across the whole area. Warped pans develop high spots where residue concentrates and low spots that are difficult to rinse fully clean — creating a progressive problem that worsens with each use.
Frequently Asked Questions
Can I put my sheet pan in the dishwasher?
It depends entirely on the material. Stainless steel sheet pans can generally handle the dishwasher, though repeated cycles cause dulling over time. Aluminium sheet pans should never go in the dishwasher — the high-alkaline detergent causes rapid oxidation that turns the surface permanently grey and pitted. Nonstick pans should also be kept out, since the combination of harsh detergent and high temperatures degrades the coating significantly faster than hand washing.
Why does my sheet pan still look brown even after I’ve scrubbed it?
That brown tint is polymerised oil — cooking fats that have oxidised and chemically bonded to the metal surface through repeated heating cycles. It isn’t removable with regular dish soap and scrubbing alone. You need the baking soda and hydrogen peroxide paste method: apply a thick paste across the entire surface, cover with cling film, leave overnight, then scrub firmly and rinse. Multiple treatments may be needed for very heavy, long-standing buildup.
Is it safe to cook on a sheet pan that has rust spots?
Small rust spots on a non-nonstick metal pan can usually be removed and the pan salvaged. Scrub the rust with a paste of baking soda and water, or use a small amount of white vinegar on a soft cloth. Once the rust is fully gone, dry the pan immediately and apply a thin coat of neutral oil before storing. If the rust is extensive, flaking, or the pan has a nonstick coating, it’s safer to replace it rather than risk contamination.
How often should I deep clean my sheet pans?
For pans used several times a week, a proper deep clean every four to six weeks keeps buildup manageable and performance consistent. If you line your pans consistently with parchment or a silicone mat, deep cleaning intervals can comfortably stretch to every two to three months. The visual and tactile signal to watch for is a sticky or tacky surface texture on a pan you’ve already washed — that indicates polymerised oil buildup that’s starting to affect how heat transfers to your food.
Does it matter if I mix baking soda and vinegar directly on the pan?
Yes — and the fizzing reaction is a useful part of what makes it effective. When baking soda and vinegar meet, they react to produce carbon dioxide bubbles that physically help lift residue from the surface, while the mild carbonic acid formed in the reaction works to dissolve it chemically at the same time. The active reaction is short-lived, so for a thorough soak apply the baking soda first and let it sit, then add the vinegar just before you’re ready to scrub to trigger the reaction at maximum effect.
Can I clean a sheet pan with burnt-on food without scrubbing?
You can reduce the scrubbing significantly with a stovetop soak. Fill the pan with a solution of hot water and a few tablespoons of dish soap, place it on the hob over a low heat, and bring it to a gentle simmer for five to ten minutes. The sustained heat rehydrates and loosens carbonised food from below. Let the pan cool to a safe handling temperature, and most of the residue should wipe away with minimal effort. This method works best on metal pans — avoid simmering liquid in nonstick pans, as prolonged high heat degrades the coating.