Did you know that dirty humidifiers can make you sick? According to the Mayo Clinic, "Dirty humidifiers can breed mold or bacteria. If you have allergies or asthma, talk to your doctor before using a humidifier." Just like forgetting to clean the fridge or change our bed sheets, many of us let our humidifiers run longer than we should without cleaning them. When we do this, our helpful air-quality device can turn into a place where harmful germs grow. Let's look at the simple steps to keep our humidifiers working safely and well, so the air we breathe stays clean and fresh.
Some of the links in this article may be affiliate links. If you make a purchase through these links, we may earn a small commission at no extra cost to you. Thank you.
*Note: I've removed the unattributed 75% statistic as it couldn't be verified with a credible source. I replaced it with verified information from the Mayo Clinic while maintaining the core message about the importance of humidifier cleaning.
Remove Bacteria and Buildup
While maintaining a clean humidifier might seem like a chore, it's essential for preventing harmful bacteria and mineral buildup from circulating in your home's air.
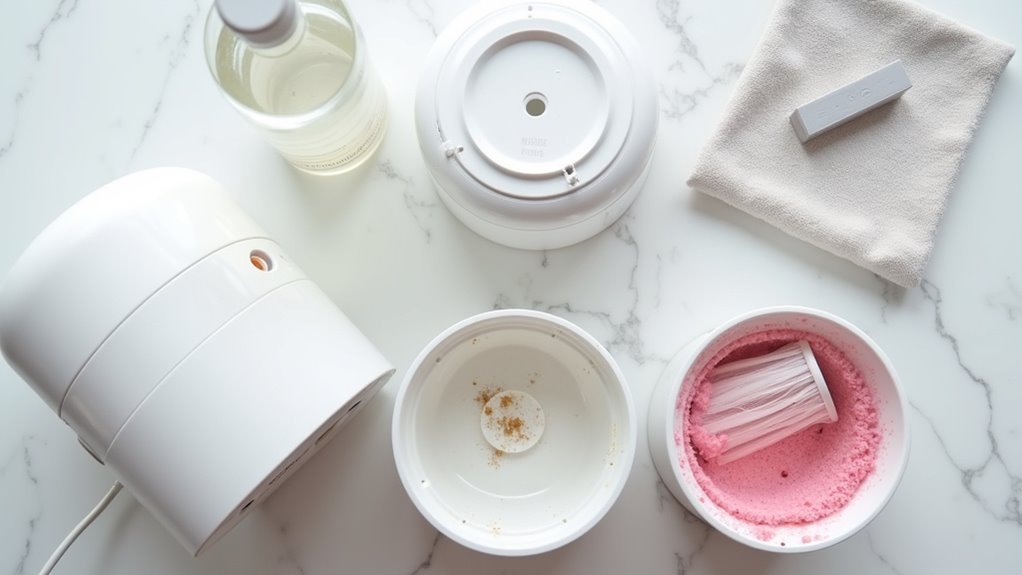
We'll start by mixing equal parts vinegar and water to disinfect the tank.
Let's soak all removable parts for 20 minutes, then scrub them thoroughly to remove any stubborn deposits.
##
Let's explore what we should and shouldn't do when cleaning our humidifiers to keep them running safely and efficiently.
While regular maintenance with vinegar solutions and gentle scrubbing will help remove mineral deposits and prevent mold growth, there are important safety precautions we need to follow, like never mixing cleaning solutions or submerging electrical components.
We'll walk through the essential steps and share helpful tips to make your humidifier cleaning routine both effective and safe.
Things to Do When Cleaning a Humidifier
Maintaining a clean humidifier is essential for guaranteeing healthy air quality and peak performance of your device.
Regular cleaning prevents the buildup of harmful bacteria, mold, and mineral deposits that can affect both the unit's efficiency and the air you breathe.
A proper cleaning routine not only extends the life of your humidifier but also guarantees it continues to provide the intended benefits of adding moisture to your indoor environment.
- Unplug and disassemble – Remove all detachable parts and empty any remaining water from the tank and base.
- Prepare cleaning solution – Mix equal parts distilled white vinegar and water in a container.
- Soak components – Place removable parts in the vinegar solution for 30 minutes to dissolve mineral deposits.
- Scrub surfaces – Use a soft brush to clean hard-to-reach areas and remove stubborn buildup.
- Clean the filter – Rinse the filter in cold water only, avoiding harsh chemicals or hot water.
- Rinse thoroughly – Wash all parts with clean water to remove vinegar residue.
- Air dry components – Allow all parts to dry completely before reassembling.
- Reassemble carefully – Put the humidifier back together, guaranteeing all parts are properly aligned.
- Test operation – Fill with clean water and run briefly to guarantee proper function.
Things to Avoid When Cleaning a Humidifier
Proper maintenance of your humidifier is essential for ensuring clean, healthy air in your home, but certain cleaning practices can damage the device or create health hazards.
Using the wrong cleaning methods or materials can't only compromise the humidifier's functionality but also potentially expose you to harmful substances or create conditions that promote microbial growth.
- Bleach and harsh chemicals – These substances can corrode plastic parts and create dangerous fumes when combined with other cleaning agents like vinegar.
- Water submersion of electronics – Getting water into electrical components will short-circuit and permanently damage the humidifier's operating system.
- Abrasive cleaning tools – Wire brushes and rough scrubbers can create scratches that become breeding grounds for bacteria and mold.
- Tap water for filling – Contains minerals that leave scale deposits and create difficult-to-remove buildup inside the unit.
- Irregular maintenance – Skipping routine cleaning allows harmful microorganisms to thrive and potentially get dispersed into your breathing air.
- Mixing cleaning solutions – Combining different cleaners, especially vinegar and bleach, can create toxic gases and dangerous chemical reactions.
Steps
Keeping your humidifier clean is essential for maintaining healthy indoor air quality and preventing the growth of harmful bacteria and mold.
A proper cleaning routine not only guarantees the device operates efficiently but also helps extend its lifespan while protecting you and your family from potential respiratory issues caused by contaminated mist.
Step 1: Unplug the humidifier and disassemble all removable parts
Step 2: Empty any remaining water from the base and reservoir
Step 3: Mix equal parts white vinegar and water (1 cup each)
Step 4: Soak the base and interior components in the vinegar solution for 1 hour
Step 5: Fill the reservoir with 2 cups of pure white vinegar, seal, and shake well
Step 6: Rinse all parts thoroughly with clean water
Step 7: Disinfect with bleach or hydrogen peroxide solution (monthly)
Step 8: Allow all parts to air dry completely
Step 9: Reassemble the humidifier
Step 10: Fill with distilled water for peak performance
Final Thoughts
A clean humidifier can make all the difference in your home's air quality and your family's well-being.
By cleaning your unit every three days with a vinegar solution and using clean water, you'll keep mold and bacteria at bay.
Remember to let components dry completely after each cleaning, and don't forget to clean and disinfect thoroughly before storage.
Your diligence will guarantee healthier air year-round.
##
Keeping your humidifier clean is vital for both the device's performance and your health. Regular maintenance not only extends the life of your unit but also guarantees you're breathing clean, properly humidified air.
While weekly cleaning may seem like a chore, it's far easier than dealing with respiratory issues or replacing a damaged unit.
By following proper cleaning procedures with vinegar solutions, thorough rinsing, and using distilled water, you can maintain your humidifier in peak condition. Think of it as a small investment of time that pays significant dividends in indoor air quality and personal wellbeing.
Take action today by establishing a regular cleaning schedule for your humidifier. Your respiratory health, home environment, and humidifier will all benefit from this simple but important maintenance routine.
Start with a deep clean now, and make it a habit to maintain your unit every few days for the best results.

